 ultimate-guide
Outdoor Kitchen Design for Small Backyards: 2026 Guide
Table of Contents
- Start With Outdoor Kitchen Layout Dimensions That Fit Your Space
- Pick Compact Outdoor Kitchen Appliances That Earn Their Spot
- Small Backyard Grill Station Ideas That Maximize Function
- Outdoor Kitchen Design for Small Backyards: Material Choices That Last
- Modular vs. Built-In: Cost and Installation Trade-Offs
- Vertical Storage and Wall-Mounted Systems for Compact Kitchens
- DIY vs. Professional Installation: What Small Backyards Require
- Final Checklist Before You Build Your Outdoor Kitchen Design
- Frequently Asked Questions
Last Updated: September 5, 2026
Start With Outdoor Kitchen Layout Dimensions That Fit Your Space
Outdoor kitchen design for small backyards starts with one hard truth: you cannot build what you cannot measure. Before you buy a single appliance, map your patio and identify the footprint you have available. At allvalley, we have spent over 26 years fitting premium setups into compact Southern California yards, and the most common mistake we see is homeowners purchasing a built-in grill before confirming utility hookups and clearances.
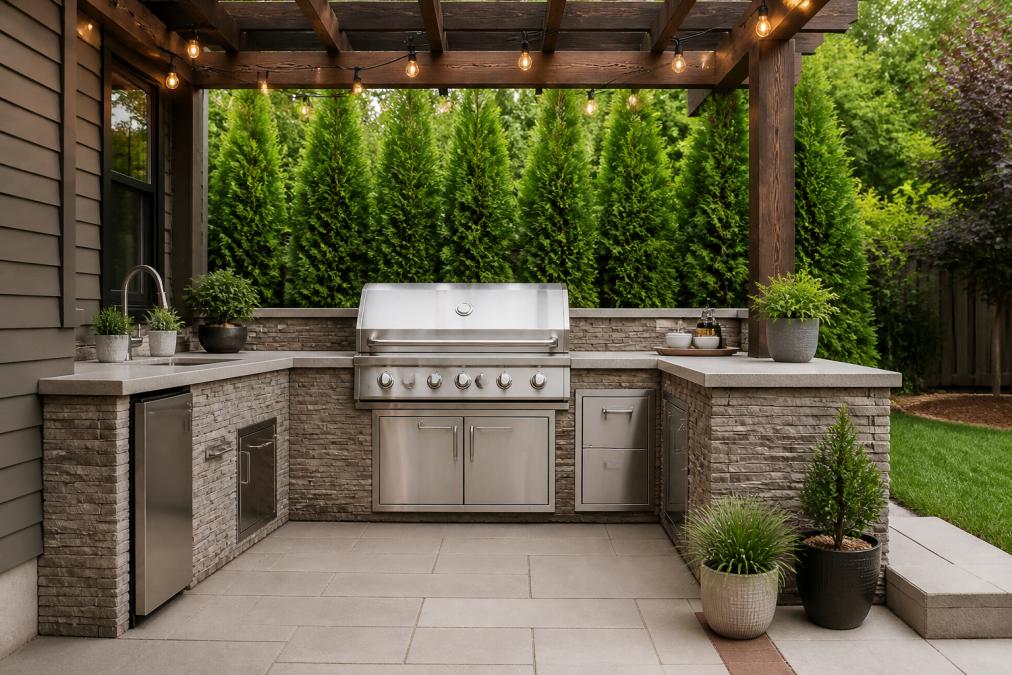
The minimum footprint is roughly 8 to 10 linear feet of counter run for a built-in grill, a small prep station, and a landing area (hgtv.com). You also need about 36 inches of walk space in front and at least 24 inches of clearance on the cooking side for safe lid operation. Sketch your layout on graph paper first, and confirm gas line and electrical outlet positions before finalizing.
Three Layout Configurations That Fit Tight Patios
Most small backyards can accommodate one of three proven layouts. Choose based on your patio shape and where your doors and windows sit.
Single-wall layout (8-10 linear feet): The most common solution for narrow yards. Place the grill in the center, a small prep section on one side, and a landing area on the other. Keep the total depth under 30 inches so you preserve walk space.
L-shape layout (10-12 linear feet total): Use a corner to gain counter space without extending the footprint. The short leg (4-5 feet) works well for a sink or refrigerator, while the long leg (6-7 feet) holds the grill and prep area.
Galley layout (two parallel runs): If your yard is wider than it is deep, place the grill and prep on one side and a slim counter or bar on the other. Leave 48-60 inches between the two runs so two people can work back-to-back without colliding.
Exact Clearance Numbers That Keep You Safe and Comfortable
Clearance requirements are not suggestions, they affect both safety and usability. The National Fire Protection Association (NFPA) publishes guidelines for gas grill placement, and most local building codes adopt similar rules (nfpa.org). Follow these minimums:
- 36 inches of walk space in front of the entire kitchen run.
- 24 inches of clearance on the open side of a built-in grill lid.
- 12 inches of clearance behind the grill if it sits against a combustible wall. Non-combustible surfaces like concrete block or stone veneer can reduce this to zero.
- 60 inches of overhead clearance if you build under a pergola or roof.
How to Measure Your Patio Before You Sketch
Use a tape measure and record three numbers: total patio length, total depth, and distance from the house wall to permanent obstacles. Mark the location of your gas line stub-out, electrical outlet, and hose bib on your sketch. These utility points often dictate where the grill can go, since moving them costs $500-$1,500 depending on distance and local labor rates.
A common pattern is to place the grill within 6 feet of the gas line termination. Beyond that, you will need a licensed contractor to extend the line, which adds cost and requires a permit in most jurisdictions. If your utility stub-outs are on the opposite side from your ideal grill location, adjust the layout rather than paying for a long gas line run.
The 60-Second Space Test
Before you commit to a layout, tape out the full footprint on your patio using painter's tape. Place a folding table and chair where the grill and prep counter will go, then walk through cooking a meal: open the grill lid, set down a platter, and move to the serving area. If you have to sidestep or squeeze past anything, widen the walk space or reduce the counter depth.
Pick Compact Outdoor Kitchen Appliances That Earn Their Spot
Compact outdoor kitchen appliances must justify every inch they occupy. A 30-inch built-in grill paired with an under-counter refrigerator and a single storage drawer column delivers more function than a sprawling setup with redundant features.
The most efficient small layouts follow a simple triangle: grill, sink or prep surface, and outdoor dining area. If plumbing access is a problem, skip the sink and invest in a larger prep cart instead. Many homeowners swap a traditional side burner for a pizza oven insert, which adds versatility without consuming extra countertop real estate.
Small Backyard Grill Station Ideas That Maximize Function
A small backyard grill station thrives on vertical thinking. Wall-mounted systems, magnetic tool racks, and fold-down side shelves keep essential items within reach while freeing up countertop space. Consider a kettle grill on a rolling cart for flexibility, or a built-in grill with an overhead cabinet for weather-resistant storage.
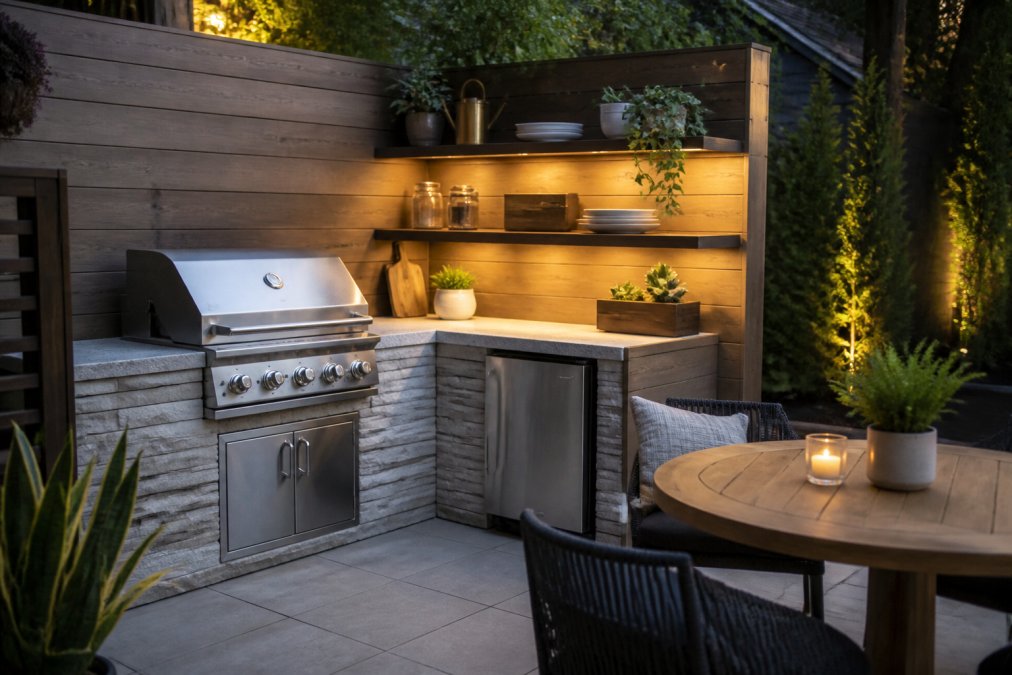
The best grill station ideas for tight spaces treat every surface as an opportunity. Use the space beneath the grill for storage drawers and a trash pull-out. Install a bar seating overhang on the serving side so guests can sit without crowding your cooking zone.
Outdoor Kitchen Design for Small Backyards: Material Choices That Last
Material selection determines whether your outdoor kitchen design survives the elements or becomes a maintenance headache. In hot, dry climates, powder-coated aluminum and stainless steel cabinetry resist fading and corrosion far better than wood frames. For countertops, porcelain tile and sealed concrete handle intense sun without warping, while granite requires annual sealing.
Weather-resistant cabinetry is non-negotiable for built-in installations. Marine-grade polymer and stainless steel are the most durable finishes for outdoor exposure, and they clean up with just soap and water. If you are working with a tight budget, modular kitchen units with aluminum frames offer a middle ground between cost and longevity. Avoid particleboard or MDF, which swell and delaminate after a single wet season.
Why Your Local Climate Should Drive Every Material Choice
Most design guides treat material selection as one-size-fits-all, but the same countertop that thrives in a dry desert yard can fail within two years in a humid coastal environment. The three climate zones that stress outdoor kitchens differently are coastal salt air, hot arid sun, and high humidity with freeze-thaw cycles.
Coastal and Salt-Air Zones: Corrosion Is Your Only Enemy
If you live within 3 miles of the ocean, salt-laden air attacks metal finishes relentlessly. Standard 304 stainless steel will show pitting within 18-24 months (peer-reviewed research). Upgrade to 316 marine-grade stainless steel for all exposed hardware, grill burners, and fasteners. It costs roughly 20-30% more than 304 grade but resists chloride corrosion far longer.
For cabinetry, skip aluminum frames with powder-coated finishes, salt air finds every scratch and starts corrosion underneath. Marine-grade polymer (HDPE) or teak are better choices. For countertops, avoid polished granite, which can develop a dull film from salt buildup. Sealed porcelain tile or quartzite holds up better and cleans with plain water.
Hot Arid Zones: UV Radiation and Thermal Shock
In desert climates like Arizona, Nevada, and inland Southern California, the sun does more damage than moisture. Dark-colored countertops absorb heat and can reach surface temperatures above 150°F, making them unusable for food prep on summer afternoons. Choose light-colored materials: porcelain tile, light concrete, or light granite. custom outdoor design.
UV radiation fades powder-coated finishes and causes some polymers to become brittle. Look for cabinetry with UV-stabilized coatings or use stainless steel, which does not fade. For wood accents, avoid teak and ipe, they dry out and crack in arid heat. Use thermally modified ash or aluminum-framed panels instead.
Thermal shock is another hidden issue. A countertop that sits in 110°F sun all day can crack when you place a cold beverage or ice bucket directly on it. Sealed concrete and natural stone are most vulnerable. Use trivets or cutting boards as a buffer, or choose porcelain tile, which handles rapid temperature changes better.
Humid and Freeze-Thaw Zones: Moisture Intrusion and Cracking
In the Southeast and mid-Atlantic, high humidity promotes mold growth behind cabinetry panels, while northern states face freeze-thaw cycles that crack porous materials. For cabinetry, sealed marine-grade polymer is the safest choice, it does not absorb moisture and will not support mold. Stainless steel also works but requires ventilation behind the panels to prevent condensation buildup.
For countertops, avoid porous concrete and unsealed natural stone. Water seeps into microscopic pores, then expands when it freezes, causing spalling and cracks. Sealed porcelain tile or engineered quartz are better options.
If you build in a freeze-thaw zone, install a drain system under the countertop so water never pools. Slope the counter surface slightly (1/8 inch per foot) toward the back or a drip edge.
A Quick Material Selection Matrix by Climate
| Material | Coastal Salt Air | Hot Arid | Humid / Freeze-Thaw |
|---|---|---|---|
| 304 stainless steel | Poor, pits within 2 years | Good | Good |
| 316 marine-grade stainless | Excellent | Good | Good |
| Powder-coated aluminum | Fair, scratches corrode | Good | Fair, moisture behind coating |
| Marine-grade polymer (HDPE) | Excellent | Good | Excellent |
| Sealed porcelain tile | Excellent | Excellent | Excellent |
| Sealed concrete | Fair, needs frequent resealing | Good | Poor, cracks in freeze-thaw |
| Granite (sealed) | Fair, salt film | Good | Fair, needs annual sealing |
| Engineered quartz | Good | Good | Excellent |
Modular vs. Built-In: Cost and Installation Trade-Offs
Modular and built-in outdoor kitchens serve different owners, and the choice comes down to permanence versus flexibility. Modular units arrive as freestanding pieces you arrange on site, keeping installation simple and letting you reconfigure later. Built-in kitchens require hardscaping, custom cabinetry, and professional gas line installation, delivering a seamless look that adds more permanent value.
The cost gap between the two approaches is significant, but it is not just about the sticker price. Modular setups often need less site preparation and can be installed over an existing concrete pad. Built-in projects frequently require demolition, new foundations, and coordination with local zoning regulations and permit inspections. If you plan to stay in your home for a decade or more and entertain regularly, the built-in route justifies its expense. For renters or first-time homeowners, modular units offer most of the function at a fraction of the commitment.
Vertical Storage and Wall-Mounted Systems for Compact Kitchens
Vertical storage transforms unused wall space into the most valuable real estate in a small outdoor kitchen. Open shelving above the counter keeps frequently used tools visible and accessible, while sealed cabinets protect less common items from dust and pests. A magnetic knife strip and a rail system for utensils free up drawer space for larger equipment.
Wall-mounted systems also solve ventilation requirements that plague enclosed outdoor cooking areas. Installing a pergola with a mounted exhaust fan or positioning the grill so smoke drifts away from seating keeps the space comfortable without a full chimney. For corner spaces that often go wasted, add a lazy Susan shelf unit or a swing-out pantry to maximize every cubic foot.
DIY vs. Professional Installation: What Small Backyards Require
DIY installation works for modular setups and simple grill carts, but professional installation is the safer call once gas, electrical, or structural work enters the picture. A built-in grill connected to a natural gas line is not a weekend project; improper connections create fire safety risks and can void manufacturer warranties. Licensed contractors also understand local building codes, ventilation requirements, and zoning regulations.
The feasibility of a DIY approach depends on your existing utility hookups. If your gas line termination is already within a few feet of the proposed grill location, a handy homeowner can manage the connection with a permit and inspection. If you need to run new gas or electrical lines across the yard, hire a professional. The cost of correcting a failed DIY installation almost always exceeds the savings, and professional delivery and installation services, like those allvalley offers, ensure the job is done right the first time.
Final Checklist Before You Build Your Outdoor Kitchen Design
Before you break ground on your outdoor kitchen design for small backyards, run through this final checklist to avoid costly surprises. First, confirm your patio dimensions and the exact footprint of every appliance you plan to install. Second, verify that your utility hookups, including gas, water, and electrical, are positioned to serve the layout without extension lines crossing walkways. Third, choose materials rated for your local climate and order samples to check color and texture in natural light.
| Checkpoint | What to Verify | Why It Matters |
|---|---|---|
| Layout dimensions | 36-inch walkways, 24-inch grill clearance | Prevents cramped, unsafe cooking zones |
| Utility hookups | Gas line and outlet proximity | Avoids expensive rerouting later |
| Material durability | Climate-rated cabinetry and counters | Prevents warping and corrosion |
| Installation method | DIY vs. licensed contractor | Ensures code compliance and safety |
Finally, decide on the installation method and secure any required permits before purchasing equipment. A thoughtful plan keeps the project on budget and ensures your new outdoor kitchen becomes a gathering spot you use for decades. For help selecting equipment that fits your space and your lifestyle, the allvalley team can guide you through grills, cabinetry, and accessories that are built to last.
Building an outdoor kitchen in a small backyard comes down to disciplined planning, not square footage. Measure carefully, choose appliances that earn their place, and invest in materials and installation that withstand your climate. For over 26 years, allvalley has helped homeowners across the region create outdoor retreats with reliable BBQ equipment, hot tubs, and fireplaces, backed by professional delivery and installation services. Call us at 760-342-5277 to get started on an outdoor kitchen that fits your space and your budget.
Frequently Asked Questions
What is the ideal layout for an outdoor kitchen in a small space?
An L-shaped or straight-line layout is usually the most efficient for small backyards. A straight line works when you have one wall or fence line to build against, while an L-shape adds counter space by turning a corner. Keep the grill, sink, and prep area within a few steps of each other to create a practical work triangle. Aim for at least 36 inches of walkway space in front of the counters so the kitchen never feels cramped.
What is the cheapest way to build an outdoor kitchen?
The cheapest way to build an outdoor kitchen in a small backyard is to use modular units instead of custom masonry. Freestanding cabinets, a portable propane grill, and a butcher-block countertop can be assembled in a weekend and cost far less than built-in construction. You also skip most permit and gas line expenses. Upgrade pieces over time, like adding a drop-in grill later. This approach keeps the initial investment low while still giving you a fully usable cooking space.
What are the most space-efficient grill options for small backyards?
A built-in gas grill in the 24 to 30 inch range is the most space-efficient choice for a small backyard kitchen because it fits flush into a counter and leaves room for prep space on both sides. If you are not ready for a permanent build, a compact propane kettle grill or a flat-top griddle on a rolling cart offers flexibility. Both can be stored away when not in use, freeing up valuable patio square footage.
Do I need a permit for a small outdoor kitchen installation?
Permit requirements vary by city, but most small outdoor kitchens need a permit if you run a gas line, add plumbing, or install electrical outlets. A simple modular setup with a propane grill usually does not require one. Check with your local building department before starting, since zoning regulations and setback rules often apply. If you hire a professional installer, they should handle the permit process and inspections as part of the project.
This article was written using GrandRanker