 how-to
7 Covered Outdoor Kitchen Designs Built for All Weather
Last Updated: November 14, 2026
Quick Summary
A covered outdoor kitchen is a permanent cooking and prep area protected by a roof, pergola, or pavilion that extends its usable season well beyond fair weather. Start with the shelter decision, because it determines how much rain, sun, and wind your cooking area blocks and sets the budget for everything underneath it.
- A solid roof blocks rain, direct sun, and most wind-driven debris, while open lattice only shades.
- Keep the work triangle legs a few steps apart in roughly 100 square feet.
- Slope the slab roughly 1/8 to 1/4 inch per foot away from the house.
- A solid roof needs open sides on at least two exposures plus a ridge or gable vent.
- Never save on the roof, drainage, or the structure holding it all up.
Table of Contents
- Start With Shelter: Roof, Pergola, and Pavilion Options for a Covered Outdoor Kitchen
- Modern Covered Outdoor Kitchen Structures That Handle Sun, Wind, and Rain
- Covered Outdoor Kitchen Attached to House: Wall Placement, Clearances, and Permits
- Small Covered Outdoor Kitchen Design for All Weather: Layouts That Fit
- Materials That Survive Every Season: Cabinetry, Countertops, and Flooring
- Covered Outdoor Kitchen Ideas on a Budget: Where to Save and Where Not To
- Drainage, Ventilation, and Fire Clearances You Cannot Skip
- Plan Your All-Weather Kitchen With allvalley
- Frequently Asked Questions
Start With Shelter: Roof, Pergola, and Pavilion Options for a Covered Outdoor Kitchen
A covered outdoor kitchen design for all weather starts with one decision: what goes over your head. The shelter you choose determines how much rain, sun, and wind your cooking area actually blocks, and it sets the budget for everything underneath it.
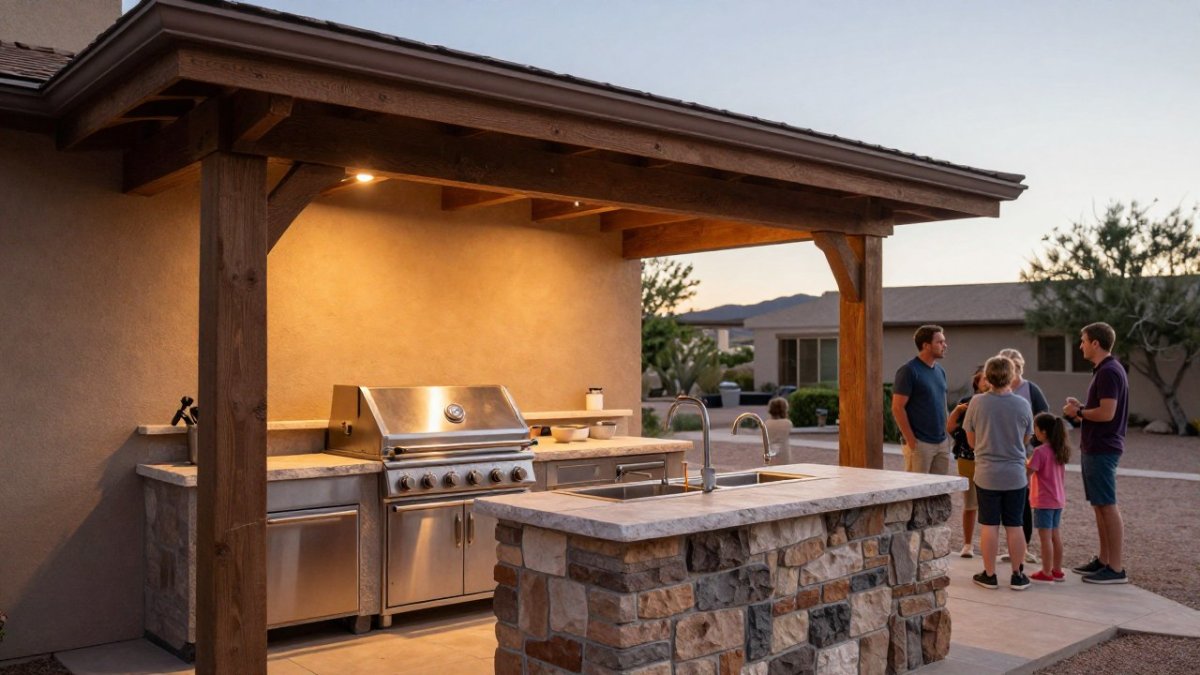
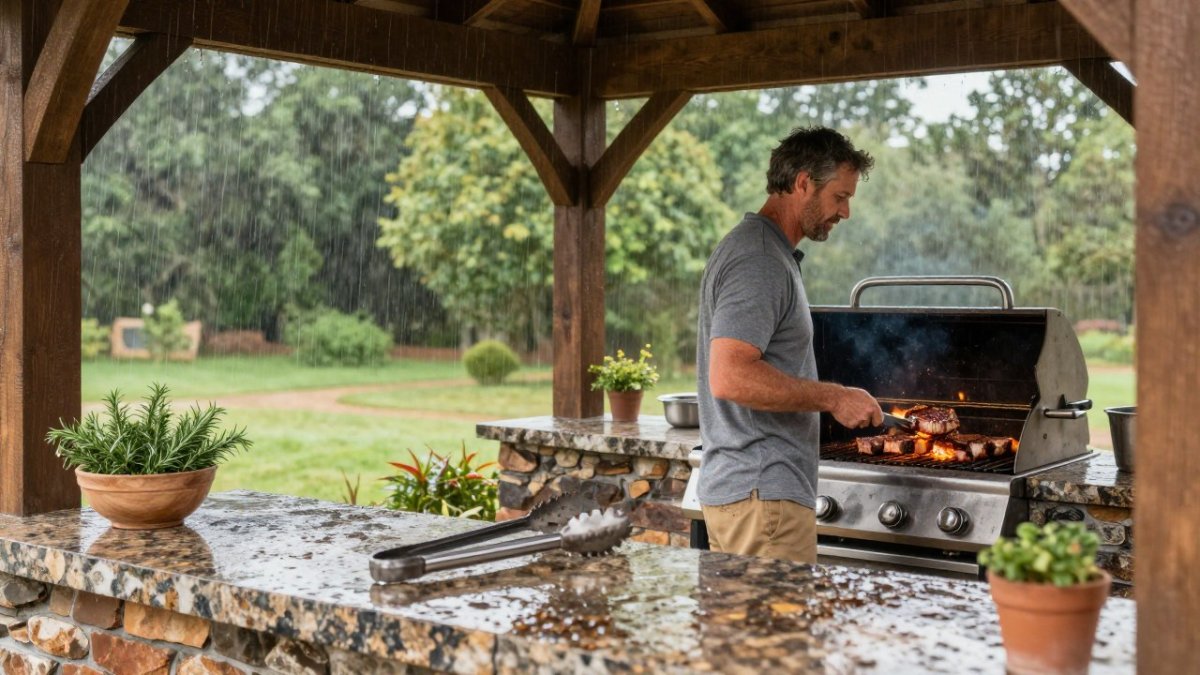
Here is the working definition we use with every customer: a covered outdoor kitchen is a permanent cooking and prep area protected by a roof, pergola, or pavilion structure that extends its usable season well beyond fair weather.
Solid Roof vs. Open Lattice: What Each One Blocks
A solid roof blocks rain, direct sun, and most wind-driven debris. An open lattice pergola blocks harsh midday sun but lets rain and fine dust straight through. That difference matters more than most guides admit, because it decides whether your grill, cabinetry, and electrical outlets are truly protected or just shaded.
- Solid roof: full rain protection, best for year-round use and built-in appliances
- Lattice or slatted pergola: partial shade, lower cost, needs weather-rated everything beneath it
- Pavilion: freestanding solid roof, the most flexible option when you can't attach to the house
Modern Covered Outdoor Kitchen Structures That Handle Sun, Wind, and Rain
Modern covered outdoor kitchen structures lean toward clean lines, low maintenance, and engineered shade. Think flat or low-pitch roofs, powder-coated aluminum frames, and slatted panels that adjust to the sun's angle. Homeowners who want a sleek look without giving up protection often do well with a solid roof styled in a modern profile.
Wind is the detail people forget. If high-end design is your goal, browse outdoor kitchen design ideas for luxury homes for structure styles that pair modern lines with genuine weather protection.
Covered Outdoor Kitchen Attached to House: Wall Placement, Clearances, and Permits
Attaching your kitchen to the house saves money on materials and simplifies utilities, but wall placement and clearances are where projects go wrong.
Permits vary by city and county, so check with your local building department early. A covered structure often counts as an addition, and gas and electrical work usually require separate sign-offs. For a focused walkthrough of the approval side, read do you need a permit to build an outdoor kitchen before you finalize the footprint.
Small Covered Outdoor Kitchen Design for All Weather: Layouts That Fit
Small covered outdoor kitchen design for all weather works best when you plan zones before appliances. A compact footprint can still feel generous if you separate prep, cooking, and serving, then keep traffic moving in one direction. The mistake we see most often is buying the grill first and squeezing everything else around it.
The Work Triangle in 100 Square Feet
The work triangle is the distance between your prep zone, cooking zone, and serving area. In roughly 100 square feet, keep each leg short, ideally a few steps apart, so you're not circling the island with a hot tray. A straight-run layout along one wall, paired with a small prep counter, fits tight patios without crowding. For deeper layout guidance, see how to design a functional outdoor cooking area.
Materials That Survive Every Season: Cabinetry, Countertops, and Flooring
Materials decide how your kitchen ages, and no single material wins in every climate. The useful question is not "what lasts longest" but "what fails first here", and the answer changes with heavy rain, snow load, coastal salt, high wind, and intense sun. Matching the material to the dominant weather stress is generally a more useful approach than simply buying the most expensive option.
Cabinetry: Match the Enclosure to the Moisture Load
- Stainless steel frames: the default for fully exposed or solid-roof kitchens. Powder-coated 304 stainless resists rust, but coastal salt air attacks the cut edges and welds first, so specify 316 stainless for hardware and fasteners within a few miles of the coast. Watch out: uncoated carbon-steel hinges and screws will bleed rust stains onto stone within a season.
Countertops: Heat, Freeze-Thaw, and Splash Zones
- Wood butcher block: beautiful and cheap to replace, but it warps and molds under a roof that sees driven rain; keep it only in a fully sheltered zone.
Flooring: Slope, Slip Resistance, and Drainage First
Floor choice is secondary to how water leaves the slab. Hard surfaces can turn slick in heavy rain, so a textured or profiled finish is generally a safer choice than a polished one.
Fasteners, Sealants, and the Corrosion Chain
The hidden failure point is the connection between materials. Stainless fasteners and exterior-rated sealants are generally recommended for outdoor kitchen construction, and isolating dissimilar metals with a gasket helps prevent galvanic corrosion.
Covered Outdoor Kitchen Ideas on a Budget: Where to Save and Where Not To
Budget covered outdoor kitchen ideas should protect the parts that fail first. Save on finishes and décor, but never on the roof, drainage, or the structure holding it all up. A cheaper countertop can be replaced; a roof that leaks into your cabinetry cannot be ignored.
Start with a realistic installation figure so you know where the money goes. Our outdoor kitchen installation cost guide breaks down the major line items, and if you want to stretch a smaller number further, these budget patio upgrade ideas cover where savings are real.
Drainage, Ventilation, and Fire Clearances You Cannot Skip
Three things sink more covered kitchens than any other: standing water, trapped smoke, and ignored fire clearances. This is where a design either survives a decade of weather or starts failing in the first rainy season, so plan these before the slab is poured.
Drainage and Waterproofing: Move Water Before It Pools
- Roof runoff: pitch the roof away from the house and route gutters or a drainage channel to a discharge point well clear of the slab. A roof that dumps onto the cooking zone defeats the purpose of covering it.
- Floor slope: slope the slab roughly 1/8 to 1/4 inch per foot away from the house and toward a drain or daylight. Flat slabs are the most common cause of standing water under a cover.
- Splash zones: seal the counter-to-wall joint and the base of cabinetry with exterior-rated sealant, and keep the grill and sink areas on a slight positive slope so water runs off rather than wicking into seams.
- Condensation and mold: solid roofs trap humid air, especially in shoulder seasons. Open sides, ridge vents, or gable vents let moisture escape instead of condensing on the underside of the roof and dripping onto counters.
Ventilation and Roof-Height Planning for Grills Under Cover
Smoke rises and spreads, so the goal is a clear path from the grill hood to an opening. Most practitioners find that a solid roof needs open sides on at least two exposures, plus a ridge or gable vent sized to the roof area, so heat and smoke escape instead of collecting overhead. Keep the grill hood below the roof's high point and avoid beams or soffits directly above the cooking zone that trap smoke. Watch out: enclosing all four sides of a solid-roof kitchen without cross-ventilation turns it into a smoke trap and can fail inspection.
Fire Clearances and Combustible Materials
Fire clearances are set by the appliance manufacturer plus local code. Keep grills, smokers, and fire features at the manufacturer's stated distance from combustible walls, roofs, and ceiling materials, and confirm the rules with your local code office before framing. Roof combustibility matters, and local rules may restrict combustible roofs over cooking appliances. A practical checklist before you build:
- Confirm whether the structure counts as an addition and needs a permit.
- Confirm gas and electrical work require separate sign-offs.
- Record the manufacturer's clearance to combustibles for every appliance.
- Verify roof and ceiling material combustibility against local code.
- Confirm ventilation openings meet the inspector's requirements.
Seasonal Operating and Shutdown Checklist
- Before storm season: clear roof drains and gutters, check sealant joints, and secure or store loose décor and cushions.
- Winterizing plumbing: shut off and drain outdoor sink lines before the first freeze, and disconnect hoses.
- Appliance protection: cover grills and store removable components; stainless still stains if left wet under a cover.
- Off-season inspection: check fasteners for corrosion, reseal stone annually, and look for water staining under cabinetry, the earliest sign of a drainage problem.
Here are the drainage, ventilation, and clearance figures the article says to plan before the slab is poured.
| Item | Value | Note |
|---|---|---|
| Floor slope | Roughly 1/8 to 1/4 inch per foot | Slope away from house toward drain or daylight |
| Flat slabs | Most common cause of standing water | Under a cover |
| Solid roof ventilation | Open sides on at least two exposures | Plus ridge or gable vent sized to roof area |
| Enclosed four sides | Turns kitchen into a smoke trap | Can fail inspection |
| Fire clearances | Manufacturer's stated distance plus local code | Confirm with local code office before framing |
| Roof runoff | Pitch roof away from house | Route gutters clear of the slab |
Plan Your All-Weather Kitchen With allvalley
A covered outdoor kitchen that works in every season comes down to planning shelter, materials, and safety in the right order. We've spent 26 years helping homeowners build backyard retreats that hold up year after year, with professional delivery and installation services and products chosen to minimize maintenance hassles. Our team can help you plan the layout, select weather-ready equipment, and get the installation done right.
Your backyard should be ready for company in any season, not just the mild weeks. Get started with allvalley and build a covered kitchen that earns its place in your yard all year. Call us at 760-342-5277 to talk through your project.
Frequently Asked Questions
How do you design an outdoor kitchen for all-weather use?
Start with the shelter, not the grill. A solid roof blocks rain and direct sun, while side walls or roll-down screens cut wind and blowing dust. Then choose materials rated for outdoor exposure, like stainless steel appliances and stone or concrete countertops. Plan drainage so water runs away from the cooking zone, and leave clearance around the grill for ventilation. A covered outdoor kitchen designed in that order stays usable through summer heat and winter cold snaps alike.
Can a covered outdoor kitchen be attached to a house?
Yes, and it is one of the most popular layouts. Attaching the structure to an exterior wall saves on framing and gives you a natural path from the indoor kitchen. Check local permit rules first, since attached roofs and gas or electrical lines usually require inspection. Keep the grill and any fire feature at a safe distance from siding and eaves, and confirm the roof tie-in does not void your homeowner's insurance. A contractor can confirm what your jurisdiction requires.
What ventilation does a covered outdoor kitchen need?
A roof over a grill traps heat and smoke, so plan for airflow before you build. Leave at least one side open, or use a vented ridge or gable to let hot air escape. A range hood rated for outdoor use helps with smoke management if the structure is enclosed on three sides. Never box a grill into a tight corner with no path for exhaust. Proper clearance above the cooking surface matters as much as the hood itself.
How much does it cost to build a covered outdoor kitchen?
Cost depends on the structure, materials, and appliances you choose, so there is no single figure. A pergola with a basic grill island costs far less than a fully framed pavilion with stone cabinetry and a built-in fireplace. Get a quote based on your layout rather than comparing generic online numbers, since delivery and installation vary by site. For current pricing, which depends on quantity, dates, and delivery, visit allvalley's website or request a quote.