 ultimate-guide
Are Outdoor Kitchen Sink Plumbing Tips Worth Knowing?
Last Updated: October 27, 2026
Quick Summary
An outdoor kitchen sink needs three things: a controlled water supply, a drain that moves wastewater to a legal discharge point away from the structure, and venting so the drain flows freely. Plan the supply route, drain route, and vent before the countertop and cabinets go in, and confirm permit and discharge rules with your local building department first.
- A drain slope typically falls a quarter inch per foot of run.
- Use 1-1/2 inch pipe for a bar or prep sink and 2 inch for long runs or food waste.
- Every outdoor sink drain needs a P-trap, and some jurisdictions accept air admittance valves instead of roof vents.
- Install a ball valve shutoff indoors where the line leaves the house, plus a second near the sink on long runs.
- Winterizing takes about fifteen minutes and should be done before the first hard freeze.
Table of Contents
- Outdoor Kitchen Sink Plumbing Requirements You Can't Skip
- Outdoor Kitchen Sink Water Supply Options Compared
- Outdoor Kitchen Sink Drainage: Greywater, Slopes, and Venting
- Shutoff Valves and Isolating Your Outdoor Water Line
- How to Winterize Outdoor Sink Plumbing Before the First Freeze
- Permanent Plumbing vs. a Temporary Outdoor Sink Setup
- Planning Your Outdoor Sink Installation With allvalley
- Frequently Asked Questions
Outdoor Kitchen Sink Plumbing Requirements You Can't Skip
An outdoor kitchen sink is only as good as the plumbing behind it. Three non-negotiables: a controlled water supply, a drain that moves wastewater away from the structure, and venting that lets the drain flow freely. At allvalley, we've spent more than 26 years helping homeowners build backyards. A beautiful basin on a wobbly supply line is a leak waiting for its first freeze.
Water Supply, Drainage, and Venting Basics
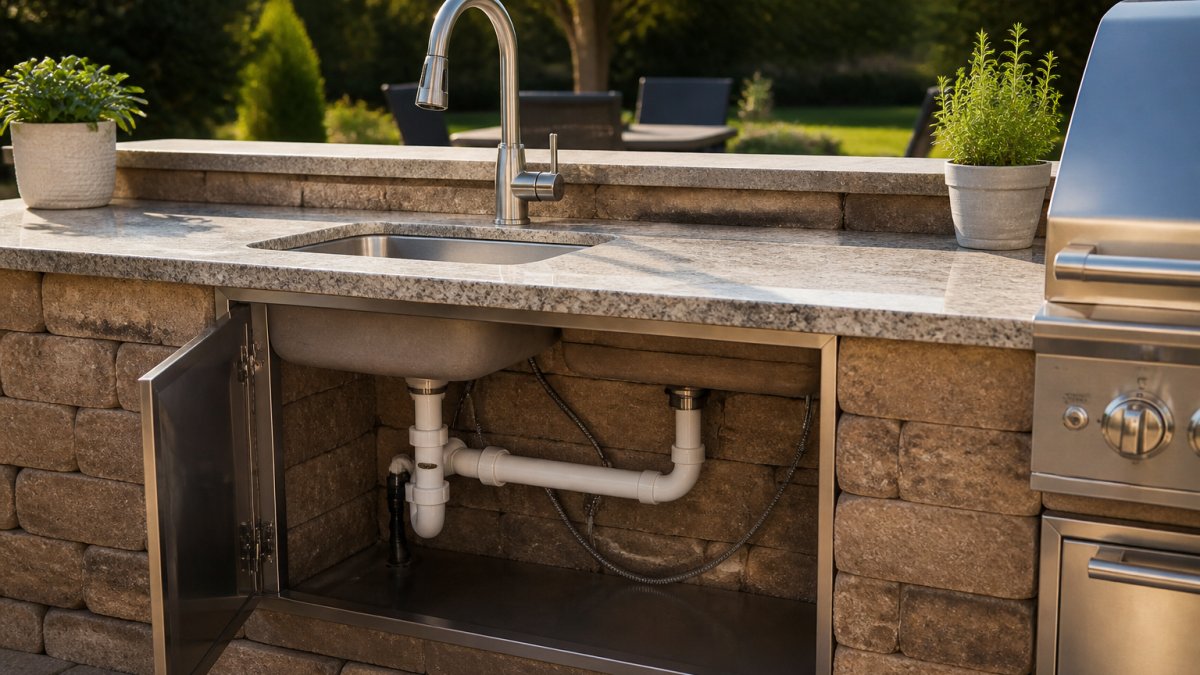
An outdoor kitchen sink plumbing system is the assembly of supply lines, drain components, and venting that delivers water to the sink and carries wastewater away safely. Each piece depends on the other two, a perfect supply line feeding an unvented drain will gurgle, drain slowly, and eventually clog. Plan these three together:
- Supply: a line sized to deliver adequate pressure at the faucet, with a shutoff you can reach
- Drain: a slope that carries greywater to a legal discharge point, trapped to block sewer gas
- Venting: air behind the water so the trap doesn't siphon dry
Most homeowners plan the sink last, after the countertop and cabinets are set. That's backwards. Route the plumbing first, then build around it.
Local Code and Permit Checks
Permits and code requirements for outdoor sinks vary by jurisdiction, and you should confirm the rules with your local building department before you dig. Many areas treat an outdoor sink connected to a potable water line and a drainage system as a plumbing alteration that requires a permit and inspection. The International Code Council's plumbing code resources outline the model codes many jurisdictions adopt, but your local amendments are what actually govern your project.
Outdoor Kitchen Sink Water Supply Options Compared
Two supply approaches dominate, and the right one depends on how often you'll use the sink and whether it needs to survive winter. A dedicated line delivers the most convenience and the most protection. A garden hose hookup is the cheapest and simplest, with real trade-offs.
| Option | Best For | Pros | Cons |
|---|---|---|---|
| Dedicated water line | Year-round use, hot water | Consistent pressure, freeze-protected routing, hidden | Requires trenching and a permit in many areas |
| Garden hose hookup | Seasonal or occasional use | Low cost, quick setup, easy to remove | Pressure drops with hose length, no hot water, freeze risk |
| Temporary tank and pump | Rentals, remote setups | No trenching, fully portable | Limited capacity, needs refilling |
Dedicated Water Line vs. Garden Hose Hookup
A dedicated water line is a buried pipe run from the house's supply to a frost-free hydrant or shutoff valve near the sink. It's the only option that supports hot and cold water at the faucet and holds steady pressure over a long run.
A garden hose hookup works fine for a sink you use a few weekends a season. If you're weighing how much of the build to hand off, our guide to contractor vs DIY installation breaks down which parts of an outdoor kitchen are worth hiring out.
Outdoor Kitchen Sink Drainage: Greywater, Slopes, and Venting
Drainage is where outdoor sinks most often go wrong, because water has to go somewhere legal and downhill. Never dump sink water onto a patio or into a storm drain; storm systems are typically reserved for rainwater, and the EPA's guidance on greywater and water reuse explains why the distinction matters.
Choosing a Legal Discharge Point
Work through the options from most to least connected to the household system:
- Sanitary sewer connection. Run a dedicated drain line from the sink trap to the house's sewer lateral, tying in through an approved fitting with a backwater valve if the run is below the fixture. This is the most broadly accepted option and the one most likely to require a permit and inspection. It is also the only option that keeps greywater out of the yard entirely.
- Septic system connection. Similar to sewer, but confirm with your local health department before tying in, some jurisdictions cap the volume or type of greywater a septic system can accept, and adding an outdoor sink can push a marginal system over its design load.
- Dry well or leach field. A buried pit filled with gravel that lets filtered greywater percolate into the soil. Acceptable in many rural jurisdictions, but usually subject to setback distances from wells, property lines, and foundations, and unsuitable where soils drain poorly.
Ask your building department three questions before you commit: Is a permit required for this drain? Which discharge points are allowed on my lot? Does the drain require a vent? Get the answers in writing so the inspection doesn't surprise you.
Sizing, Slope, and Routing the Drain Line
A drain slope is the downward pitch of the drain line that lets wastewater flow by gravity, typically a quarter inch of fall per foot of run. Too flat and water sits and solids settle; too steep and water outruns the waste, leaving solids behind.
Route the line below the frost line if it carries water year-round, or plan to drain it seasonally if it doesn't. Keep it out of traffic paths and away from tree roots, and sleeve it under patios or walkways so settling doesn't crack it.
P-Traps, Vents, and Air Admittance Valves
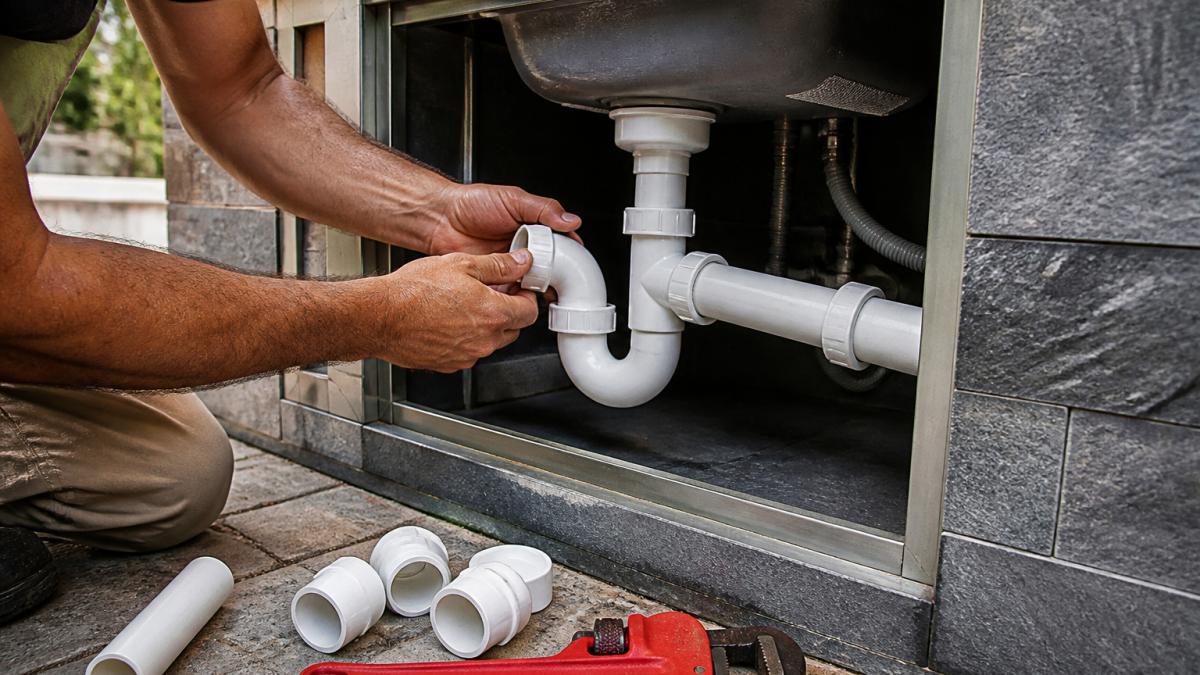
Every outdoor sink drain needs a P-trap to hold a water seal against sewer gas, and that trap needs air behind it. The trap should sit as close to the fixture outlet as practical, with the trap arm sloping to the drain and the vent taken off between the trap and the drain connection. Integrating these venting requirements becomes significantly more complex when planning around existing drains during a larger renovation project.
Shutoff Valves and Isolating Your Outdoor Water Line
Every outdoor sink needs a shutoff valve you can reach without crawling under the counter, and a ball valve is the most reliable choice because a quarter turn fully stops flow. Install it indoors where the line leaves the house, plus a second one near the sink if the run is long. Insulate and label the interior valve.
How to Winterize Outdoor Sink Plumbing Before the First Freeze
Freeze damage is the most common and most preventable outdoor plumbing failure, and winterizing takes about fifteen minutes once you know the sequence. Do it before the first hard freeze, not after. Winterization isn't one procedure, it's three, depending on how cold your winters get and whether the line stays pressurized. Pick the tier that matches your climate.
Tier 1: Mild Winters (Occasional Light Frost)
If overnight lows dip to freezing but rarely stay there, a frost-free hydrant and a drained line may be enough. A frost-free hydrant sets the shutoff valve below the frost line, so the pipe that holds water is underground and the above-ground portion drains when the handle is closed. Confirm it actually drains, open the faucet after shutting it off and watch for water to stop, and disconnect the hose so the hydrant can breathe.
Tier 2: Hard Freezes (Sustained Below-Freezing Nights)
In areas that see hard freezes, drain the line every season without exception. The sequence:
- Shut off the supply at the interior valve, the one inside the house, not the one at the sink.
- Open the faucet to release pressure and let the line drain back.
- Disconnect the supply line at the lowest point and drain it into a bucket.
- Blow residual water out with low-pressure air if the line is long or has low spots.
- Pour a little plumber's antifreeze into the P-trap, or remove and drain the trap.
- Cover the faucet and exposed fittings.
Tier 3: Deep or Extended Freezes
Where the ground freezes deep or the sink sits in an unheated structure, treat the whole assembly as seasonal. Remove the P-trap and store it indoors, blow the supply and drain lines clear, and cap the openings so rodents and debris stay out. If a low spot prevents full drainage, install a low-point drain valve there during the original build, retrofitting later means opening the trench again.
Shutoff Placement and Insulation
The interior shutoff is the single most important freeze-protection device, and its placement matters more than its type. Put it indoors where the line leaves the heated envelope, label it, and insulate it. Add a second shutoff near the sink if the run is long, so you can isolate the outdoor portion without walking back to the house. Insulate exposed supply lines with closed-cell foam sized to the pipe, and seal the wall penetration so cold air doesn't follow the pipe inside.
Recommissioning in Spring
Before the first use of the season, reverse the process: close the low-point drain, reconnect the supply, open the interior shutoff slowly and check every fitting for leaks, refill the P-trap, and run the faucet to confirm flow and check the drain for gurgling. If the sink sat unused all winter, inspect the trap for cracks and the supply line for rodent damage first.
Permanent Plumbing vs. a Temporary Outdoor Sink Setup
Permanent plumbing is a fixed supply and drain connection built into the structure, while a temporary setup uses a hose, a bucket drain, or a portable tank and can be removed seasonally. Permanent wins on convenience and resale value; temporary wins on cost, flexibility, and simplicity, especially for renters or homeowners still deciding on a layout. For most families: go permanent if the sink runs year-round, temporary if the outdoor kitchen is seasonal or the layout might change.
Planning Your Outdoor Sink Installation With allvalley
Start with the sink itself, because weight, size, and material decide how the cabinet and counter must be built to support it. Our guide on what to look for in a high-quality outdoor kitchen sink covers the durability details worth checking before you commit. Then work outward: supply route, drain route, vent, then permits.
At allvalley, we've helped Coachella Valley and Riverside County homeowners create outdoor retreats for over 26 years, with delivery and professional installation services. Before you commit, see what an outdoor kitchen installation costs so the plumbing scope doesn't surprise you. When you're ready to hire, our guide to hiring professional outdoor kitchen installers walks through vetting and what to ask. These outdoor kitchen design ideas for luxury homes show how a sink fits into a full outdoor space.
Frequently Asked Questions
What plumbing do you need for an outdoor kitchen sink?
At minimum you need a water supply line, a drain line, and a trap. A dedicated line from the house is best, though a hose hookup works for light use. The drain must slope away from the sink and connect to a legal disposal point, either the house sewer or an approved dry well. Add a shutoff valve and, where required, a vent. Check local requirements before you dig.
Can an outdoor kitchen sink connect to a garden hose?
Yes, a hose connection works for a temporary setup, but it has limits. Hose pressure drops over long runs, and standard hoses are not rated for constant pressure. If you go this route, use a short run, a Y-splitter with a shutoff, and disconnect the hose after each use. For regular cooking and entertaining, a dedicated water line is the more reliable choice.
Does an outdoor sink need a P-trap?
Yes. A P-trap holds a water seal that stops sewer gas from coming back through the drain. Outdoor sinks need one just like indoor sinks. In cold climates, drain the trap before freezing weather, since trapped water is the first thing to crack. If the sink is far from the house vent, an air admittance valve can stand in for a traditional vent pipe where code allows.
How do you keep outdoor sink pipes from freezing?
Shut off the supply valve, open the faucet to release pressure, and drain the line and P-trap before the first freeze. Disconnect any hose. Insulate exposed pipe, and if you use the sink through winter, a heat cable or self-draining faucet helps. In mild desert winters, a simple drain-down is usually enough, but hard freezes still crack unprotected lines.
Can an outdoor kitchen sink drain into the yard?
Only where local rules allow it. Many jurisdictions permit greywater from a hand sink to discharge to a dry well or landscape area, but some require a connection to the sewer. Never dump sink wastewater into a storm drain. Confirm the rule with your local building department before you route the drain, and keep the discharge point away from foundations and property lines.
How far can an outdoor sink be from the house plumbing?
There is no fixed number, but distance affects pressure and drainage. Long supply runs lose pressure, and long drain runs need more slope and often a vent. Keep the run as short as the layout allows, upsize pipe on long runs, and plan the drain slope before you pour a slab. A plumber can confirm what your setup will support.
Plumbing is the part of an outdoor kitchen nobody photographs and everybody notices when it fails. If you'd rather hand the whole project to a team that has done it for 26 years, allvalley offers professional delivery and installation services, quality equipment built to minimize maintenance, and free starter kits and chemicals with every hot tub purchase. Get started with allvalley and build a backyard that works as hard as you do. Call us at 760-342-5277.